I’m glad you could join me on this blog tour! I’m sure you’re going to get tons of ideas and have a wishlist for the new catalog a mile long! If you’ve joined me from the previous link, then you’ve come from SUDSOL. I can’t speak highly enough for the group. If you’re a demonstrator and love to get answers to questions right away, new creative and business ideas, and be kept on top of all the Stampin’ Up! happenings, then I highly recommend you try out SUDSOL for free or join right away if you’re not already a member!

When deciding what to show today, I couldn’t narrow it down to just one stamp set (I was too anxious to play with all of them), but I did limit myself to just 4″ish” sets!

Stamp Sets: Flower Shop, Four You
Colors: Island Indigo, Calypso Coral, Pear Pizzazz, White
Big Shot: Chevron Folder
Accessories: Simply Pressed Clay, Buttons & Blossoms Simply Pressed Clay Molds, Crystal Effects, Chevron Ribbon, Large Oval Punch, Scalloped Oval Punch, Pansy Punch
Project Tips: Use the simply pressed clay and mold to create the buttons. I colored with the Stampin’ Write Markers, then added some crystal effects for shine.
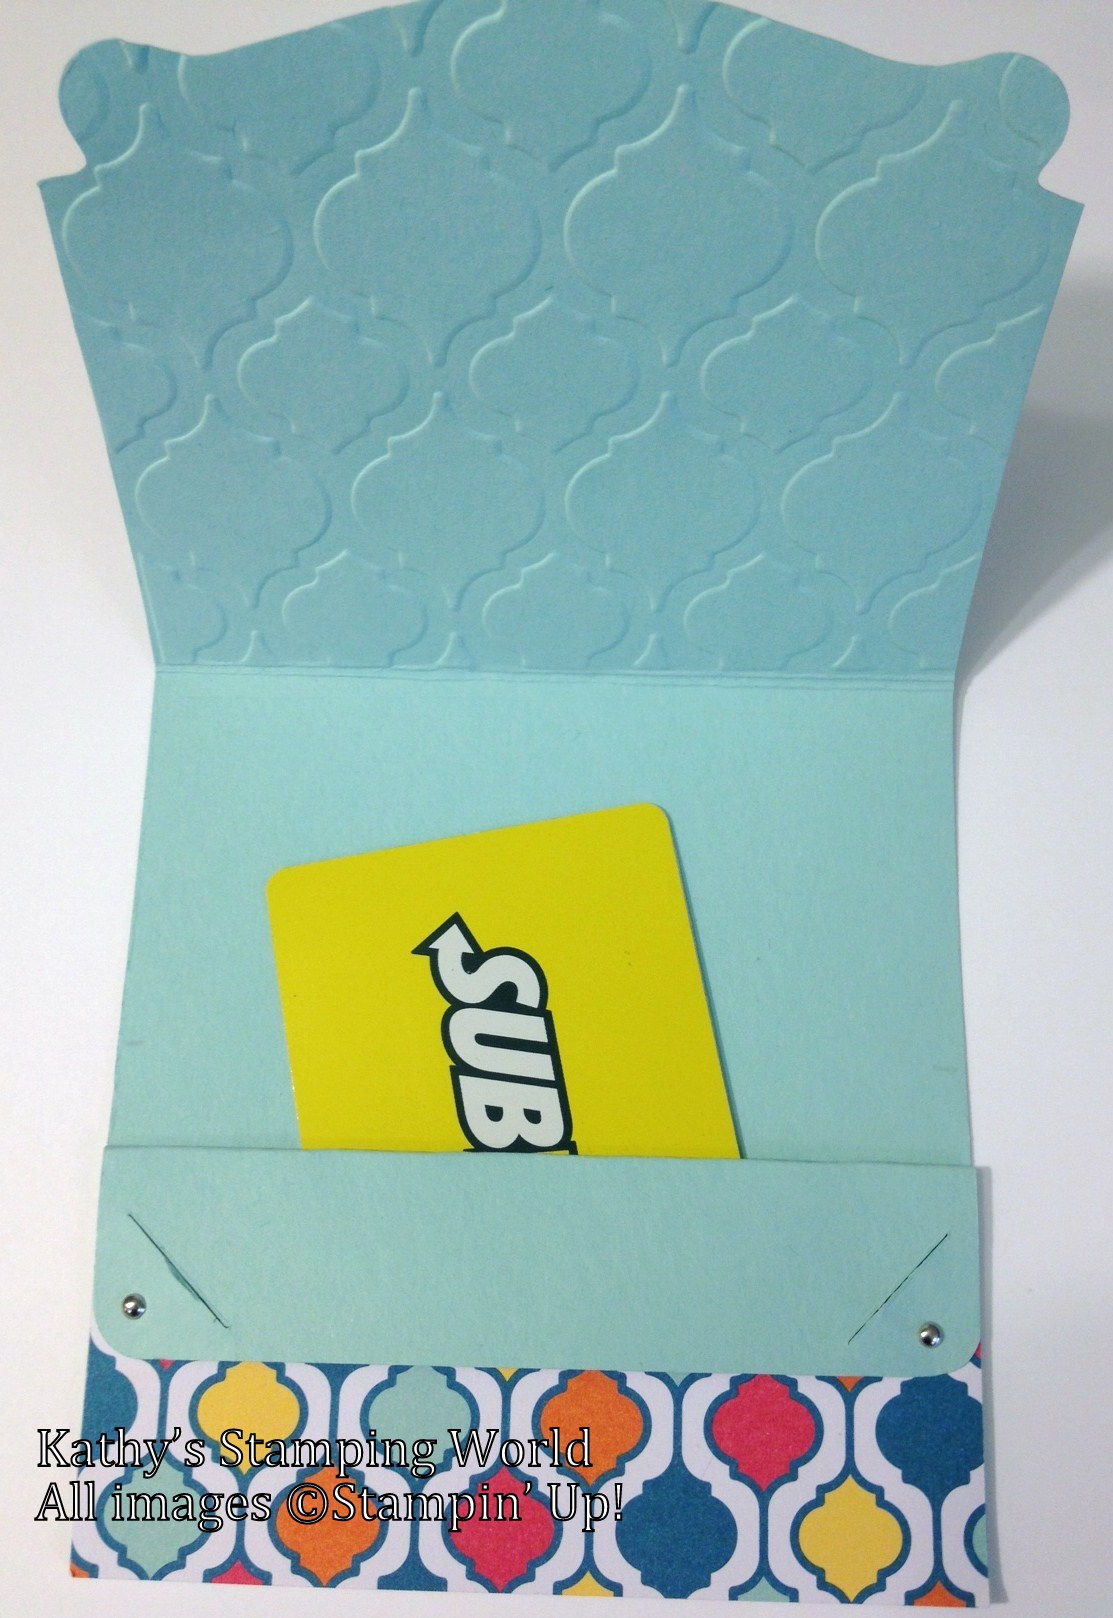
 Stamp Sets: Label Love, A Round Array
Colors: Daffodil Delight, Strawberry Slush, Island Indigo, Pumpkin Pie
Designer Paper: Quatrefancy Specialty
Big Shot: Fancy Fan Embossing Folder, Tasteful Trim Bigz XL Die
Accessories: Artisan Label Punch, 7/8″ Scallop Circle Punch, Pool Party Seam Binding
Project Tips: This project is straight forward. Just be sure to use those dimensionals as desired.
 Stamp Set: Chalk Talk
Colors: Tempting Turquoise, Melon Mambo, Tangerine Tango, White, Black
Accessories: Embossing Powder in Turquoise, Melon Mambo, and Tangerine Tango, Heat Tool, Embossing Buddy, Wide Oval Punch, Versamark Pad
Directions:
- Dab the embossing buddy over the black piece of cardstock.
- Swipe the versamark pad across the black cardstock as desired.
- Add embossing powder one color at a time tapping off the extra.
- Use the heat tool to melt the powder.
- Stamp the greeting on the black scrap versamark pad. Be sure to use the embossing buddy first.
- Emboss with the heat tool.
- Punch out.
- Adhere with a dimensional.
This last project is my favorite because I’m always in need of gift card holders!

Stamp Set: Mosaic Madness Bundle (this includes the punch)
Banner Greetings (Hostess Only set)
Colors: Strawberry Slush, Island Indigo, Pool Party, Daffodil
Delight
Designer Series Paper: Quatrefancy Specialty
Big Shot: Modern Mosaic Embossing Folder
Card Base Pop ‘n Cuts Die
For a complete tutorial as well as cardstock sizes, just click below!

I hope you enjoyed my projects today.

I love the card with the flowers and ribbon also! I have been thinking about how to use the ribbon.
I love the card with the flowers and the ribbon! Def a CASE card for me! TFS
Thanks Kirsteen, I’m flattered.
Wow! Just spectacular, Kathy! And thanks for all the little tutorials – makes everything SO easy to CASE!
Glad you liked them Robin!